Hello all,
Its been a while since i have posted on my blog and the main reason is because i have put my focus else where. So if you want to see my latest work i will be posting more regularly on these sites:
Website: http://www.rhysharvey.com/
Artstation: https://www.artstation.com/artist/rhysharvey
Facebook: https://www.facebook.com/Rhys-Harvey-Artist-1677059882513226/
Twitter: https://twitter.com/RhysWHarvey
Intagram: https://www.instagram.com/rhys_harvey_artist/
Feel free to follow me and ask any questions you have about my work. :)
Showing posts with label 3D. Show all posts
Showing posts with label 3D. Show all posts
Monday, 16 November 2015
Saturday, 25 April 2015
Head Character Texturing
The latest render of the Head character.
Original Design, Sculpting, animation and Texturing created by me. Rendering and Compositing by Matteo Veglia http://matteoveglia.com/
Textured using Mari with a mixture of ptex and uv's.
Diffuse, Specular and Bump maps for all aspects apart from the head, consisting of just diffuse and specular.
Sub Surface Scattering Texture map also created for the head.
Breakdown of texture maps will be posted soon.
I was very happy with the outcome and particularly how close it is to my original design.
Original concept by me.
3d Head Textured and Rendered
Thursday, 16 April 2015
Body Texturing wip
So lately I have been focusing on Texturing for My third year film Headless. I have been using Mari and ptex rather than uv unwrapping the model purely because we are short on time so ptex was a quicker option.
Now I have got my head around Mari and know how ptex and uv texturing within the software works I am much more confident with the software and am realising how powerful it is. As I have had to stick to a more stylised look whilst texturing this character I have had to stop my self from getting carried away with details and keep the original look from my concept which was quicker to texture as there is less detail but more frustrating as I feel like I am limiting myself.

The original Concept.
The Textured Model so far.
Now I have got my head around Mari and know how ptex and uv texturing within the software works I am much more confident with the software and am realising how powerful it is. As I have had to stick to a more stylised look whilst texturing this character I have had to stop my self from getting carried away with details and keep the original look from my concept which was quicker to texture as there is less detail but more frustrating as I feel like I am limiting myself.
The original Concept.
The Textured Model so far.
Sunday, 29 March 2015
Headless Update - Texturing
Hello all, it has been a while since I have updated my blog so there is lots to show off.
Headless as a whole has been going really well in some areas but not so much in others. I have been focusing on the Texturing side of the film and making sure the town buildings and characters have good quality textures that still fit with original style of the film. UV unwrapping was one of the laborious tasks that had to take place but now all of the buildings are unwrapped and ready for the texture artists. I have taken the role as lead Texture artist, overseeing everyone's texturing and texturing myself the characters and key interiors and exteriors of buildings. I chose to start with the Flat interior as it was one of the most important interiors and has a lot of assets to unwrap and texture.
I decided to unwrap and texture the assets as I went along instead of unwrapping everything and then texture everything at once. This way I can start to see it all coming together quickly and realise what to focus on and what not focus on. It also makes the whole process more rewarding for myself as I can see it all coming together as I work and when I get bored of uv unwrapping I move to texturing. doing it this way I have found I work much faster as I'm not doing the same thing for too long.
The original Concept created by myself

Texturing, Look development, ncloth, Lighting and rendering created by myself.
Modeling by Toby Ellis
created using Maya, Mari, Photoshop and Vray


Headless as a whole has been going really well in some areas but not so much in others. I have been focusing on the Texturing side of the film and making sure the town buildings and characters have good quality textures that still fit with original style of the film. UV unwrapping was one of the laborious tasks that had to take place but now all of the buildings are unwrapped and ready for the texture artists. I have taken the role as lead Texture artist, overseeing everyone's texturing and texturing myself the characters and key interiors and exteriors of buildings. I chose to start with the Flat interior as it was one of the most important interiors and has a lot of assets to unwrap and texture.
I decided to unwrap and texture the assets as I went along instead of unwrapping everything and then texture everything at once. This way I can start to see it all coming together quickly and realise what to focus on and what not focus on. It also makes the whole process more rewarding for myself as I can see it all coming together as I work and when I get bored of uv unwrapping I move to texturing. doing it this way I have found I work much faster as I'm not doing the same thing for too long.
The original Concept created by myself
Texturing, Look development, ncloth, Lighting and rendering created by myself.
Modeling by Toby Ellis
created using Maya, Mari, Photoshop and Vray
Im very Happy with the outcome so far and its Great to see finally some work getting close to the final stages of the film. I also used Mari to texture this scene and after learning it and continuously finding more things that it can do as a piece of software. These images are work in progress and are created using only diffuse textures.
I have also been focusing of texturing the exterior of the bookshop, again using Mari and Photoshop.
again a work in progress with just diffuse and specular maps at the moment.
Saturday, 7 February 2015
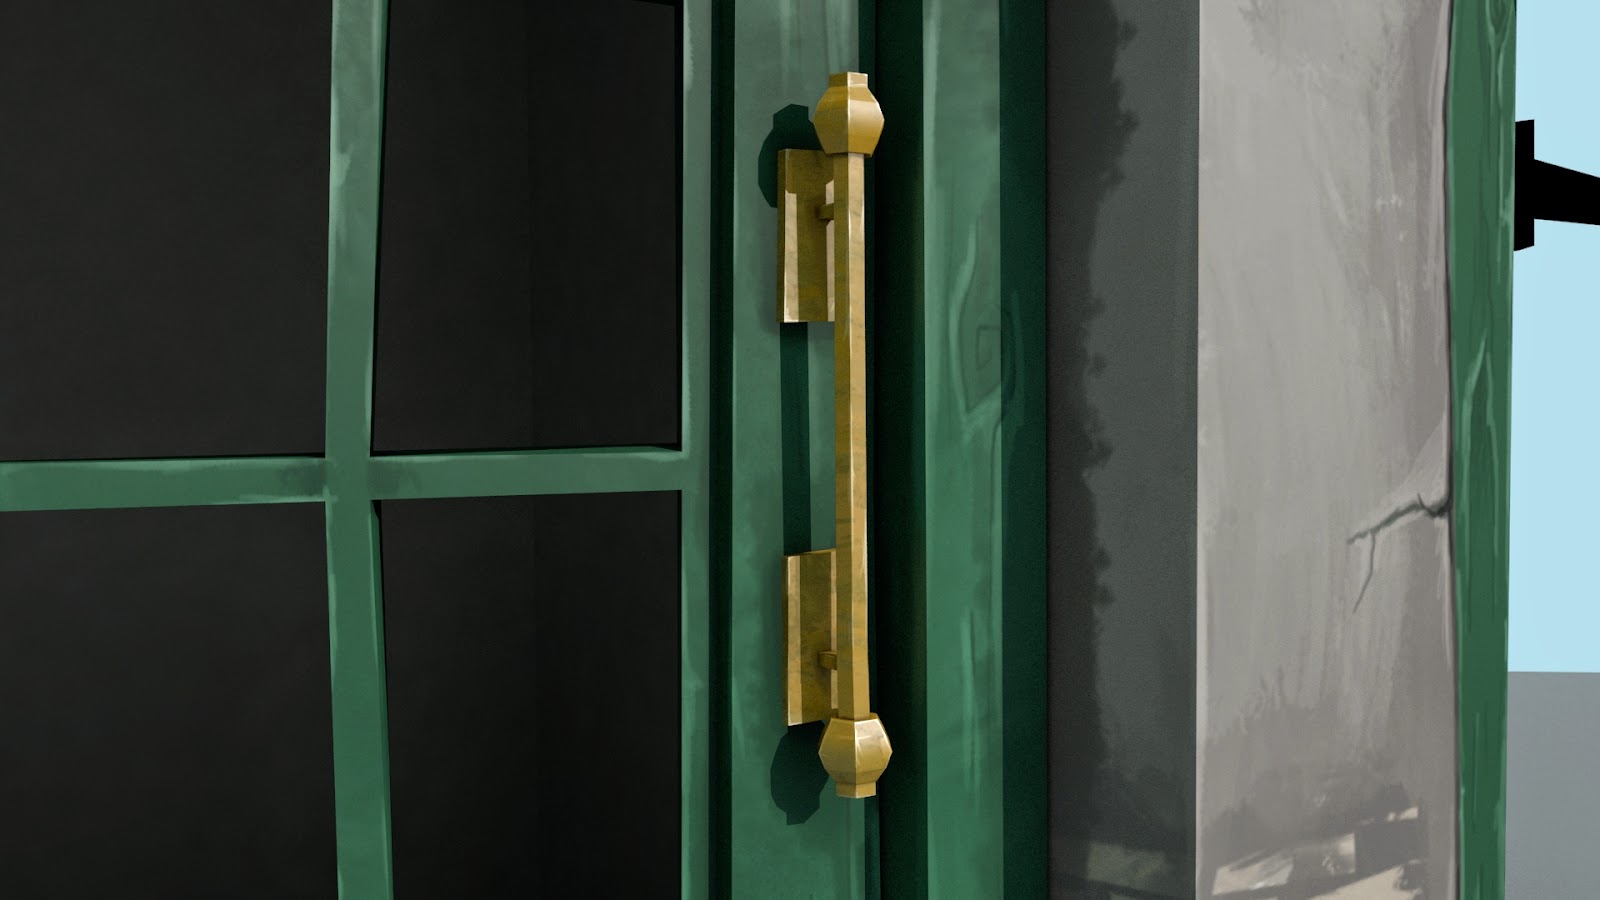
Modelling and texturing to a style
To make sure that The style of Headless is kept throughout the models and textures i decided to go through the whole process myself from concept to the final textured model in the 2d style.
The original sketch of the stylised shop.


The original sketch of the stylised shop.
The Final concept from the sketch i created.
And the final Building model and textured to fit with the original style. Modelled in Maya and fully hand painted textures using Photoshop .
Sunday, 1 February 2015
Boots Modelling and Texturing
I finally had some time to do an area that i have always loved and want to pursue more. This being 3d modelling and texturing. I wanted to start with something simple so I could get to grips with the whole process of modelling right through to the final texture.
the original 2D concept

The finished 3D textured Model with fully hand painted diffuse and spec maps


the original 2D concept
The finished 3D textured Model with fully hand painted diffuse and spec maps
Click below to have a look at the model in 3D mode
Here are the painted textures I created for this model.
Saturday, 22 November 2014
Headless Update: getting the right style
Its been a while since I posted about the Headless project and a lot has happened.
Being the director and art director on this project i have had a lot of work to do and have found myself telling people what to do more than working specifically on anything. Of course the main role of the director and art director is to keep everything looking the way that i want it and for the story to say what i want it to say and being caught up in doing the animatic and storyboard constantly i have done the character designs quickly in order to get the characters modelled so they can then be rigged. But it wasn't until i looked back on my original designs that i realised the 3d models didn't look anything like the original concepts i created.
here is the turnaround i did for the head.
And a few stills of the 3D Model in progress Created by Alan Ation
then the finalised 3D Turnaround of the head.
After looking at these for a while thinking there was something not right about the character i realised that they where far from the original concept that i did myself. Just being caught up in doing everything else i missed over the important aspects of my original design which i liked so much. So i went back and studied my original concept thoroughly.
Looking at this and having it stuck to the side of my monitor i soon realised what was missing in my first head character turnaround. It was the small things like the positioning of the eyes, ears,mouth and nose. The shape of the ears and how square they are, the shape and size of the eyes and so on.
To gett a better idea of how this concept to be created in 3d i got my hands on some clay and created this head character as a real 3d object that i could continue to look at for reference and understand more how it could work.
Although This was a very quick clay sculpt i was happy with the outcome and it helped me see where i went wrong and how it could be fixed.
The next stage i took was to re create this clay sculpt in Mudbox as a 3d sculpt that I could refine even more.
This Sculpt was simple but achieved the more innocent and charming character that i was going for and as you can see from the old and new next together the change made a difference and is now more like my original design.
Thursday, 15 May 2014
Deep
Texturing is done! its now close to the deadline and the texturing is finally all done, some of it was rushed a little but i was pleased with the outcome. It was really challenging for me as I wasn't the most confident person in Maya and had to make sure everything was working and looked good. But over all I learnt a lot from this and managed to pull it off. here is the final playblast of the city with the textures in it.
Wednesday, 30 April 2014
Deep
So the basic positioning of the buildings and look of the city is established so its now just down to modelling the city. At this stage I was in charge of putting it all together and deciding which buildings were put where as well as doing a couple more concepts. Toby and Oly modelled all the buildings and Lydia was doing concepts that the tow guys could use for reference.
The city soon got built up very quickly as we could duplicate buildings and place in different places.
here it is the look of the city so far and where the buildings would be and so on. I was pleased with the look of it at this point and really enjoyed putting it all together.
The city soon got built up very quickly as we could duplicate buildings and place in different places.
here it is the look of the city so far and where the buildings would be and so on. I was pleased with the look of it at this point and really enjoyed putting it all together.
The next stage was to figure out how we where going to do the texturing as there was so much to do in so little time. We had came across the technique of projection mapping where we could do one texture/painting and projected it straight onto the surface of the building, saving us the hassle of uv unwrapping. So I had a go at this and learnt how to technically do it and see if it would be quicker and easier than using uv unwrapping.
I found this a really interesting process and was much quicker once I learnt technically how to do it. me and lydia where more comfortable doing the texturing this was as it was more like creating a concept and was easy to see what was what as a posed to uvs where sometimes it can be confusing. So two of us textured the buildings this way and two of us uv unwrapped the buildings and done them that way.
We found that with projection mapping some parts of the buildings get missed out so we decided to use projection on the buildings that where more straight on to the camera and uvs for the more complex buildings where you see more faces of things.
here is the city so far with a few of the textures in place.
Sunday, 13 April 2014
Deep
The Deep project has come along nicely and we have started to put together more concepts and finally came up with a plan for how the styles of buildings are going to come together and work as one city.
I created a very rough concept of buildings in the format of how are camera would pan down the different levels to give the group an idea of how it could all piece together without it looking odd.


I created a very rough concept of buildings in the format of how are camera would pan down the different levels to give the group an idea of how it could all piece together without it looking odd.
And some more concepts I did for the top desert level and a couple of buildings.
i had really enjoyed doing these concepts and made me want to sit down and spend a long time on one to make it look really good but with the amount of work I had for different projects i stopped myself and got on with other concepts.
The next thing was to create the bulk of the city so we knew how it would all look with the positioning of the buildings so Oly modelled this basic composition of buildings which i adapted a bit just to re position some of the buildings.
Friday, 14 March 2014
3D Texturing
Recently I Have Been getting into doing a lot more texturing on 3d objects for the third year films. I have been working on (a light from the dark) a short film about a girl being chased by a monster. Although i don't feel like this is a great project, the work i have done on this project has taught me allot. For this project the texturing is being done through the use of uvs.
These were painted in Photoshop so it was very quick to get the detail and texture of the material in but was more awkward to read and understand what parts of the uvs where where on the 3D character.


These were painted in Photoshop so it was very quick to get the detail and texture of the material in but was more awkward to read and understand what parts of the uvs where where on the 3D character.
after getting used to it and the layout of the uvs i found myself putting them onto the 3d model to check how it would look. Then it was a case of going back a forth the 3d model and the Photoshop textures to get specific parts to look right. But this is what the textures on the 3d girl character look like so far.
I have Also been working on the thrd year film ( Heart Of the Tree) which is a short film about a hare, hiyena and a magical tree. The story is about greed and friendship, Working on this project has been a great experience so far and i look forward to doing more texturing for it.
I Have been given the task of texturing the two main characters,the hare and the hyena.These textures where created using ptex in mudbox. A method which allows the texture artist to paint straight onto the 3d object without the use of uvs. Also the style of textur that the film is going for is more painterly and in a similar style to Meet Buck. http://www.youtube.com/watch?v=6BBPaRWvT18
Here is the Final Textured hare i completed using mudbox and trying to keep to that painterly look.
Thursday, 23 January 2014
The 11 Second Club
So my 11 second animation for December is finished. I had originally hoped for it to be completed within December so I could upload it to the website but i accepted that that wasn't going to happen as I had other coursework to attend to. But it is now complete and handed in. I really enjoyed this project and felt like I have learnt allot. It was a great task to do as I went through the whole animation process from scratch starting with initial sketched and ideas through to the final rendered animation shot. so here it is ...
First rough animation.
Final 11 second Animation.
Saturday, 4 January 2014
11 Second Club Animation
So we where given the task of doing an 11 second club animation for one of are modules.
The 11 second club is a competition where each month an 11 second sound clip is given out on the website and anyone can animate whatever they want to the sound clip and they enter them on the website at the end of each month. http://www.11secondclub.com/
We where given this task half way through the month so we didn't have to enter it to the website, but the idea of doing this task is to get us to create an 11 second fully finished animation within a month.
as we started the task at the end of November we had the choice of using the November sound clip or the December. This was the sound clip that I chose to animate to.
I started buy listening to the sound clip over and over but the first thing that popped into my head was what I stuck with. it was the idea of an angry character running into a door, kicking it down and then stomping up some stairs angrily as if he's after someone and then at the end he falls through the floor boards.
I chose to use the Alex rig that I found on animation buffet which is a great resource for a range of different rigs out there.
I had played around with a few rigs and found this was nice and simple to use, had all the features that i was looking for and i liked the overall look of the character.


I then sketched out some environment concepts which i would then have to model in Maya later.

and a quick sketch of the layout of the environment and where the character would be moving about in that space.

L.A.V Tests
The next step was to do a few L.A.V tests for reference to make it easier to understand what actions i will have to animate.
I Then modelled the very basic environment and done the rough animation to fit it in with the sound.
Friday, 31 May 2013
It Happened at sea
Here is the short sea tales film that myself, Matteo Veglia, Tony Walker and Ben Wdl have been working on for the last semester. It isn't finished yet but we are happy with the outcome. we have all put a tremendous amount of work into it and are looking forward to finishing it off. I have really enjoyed working with these guys on this project and feel that it was very successful and will look good when its finished :)
Thursday, 30 May 2013
3D sculpting and texturing
This Project we had to model a close up of an environment using Maya and then putting that model into Mudbox to put extra detail in and texture it to make it look realistic. I really loved doing this project and when i got the hang of using the two pieces of software i didn't find it to hard to create what i wanted. However i do feel that my final model didn't look as well as i had hoped but all in all i was relatively happy with it and this is definitely something i would like to do more of in the future.
Motion Studies Showreel
My semester 2 motion studies show reel. looking back on this work was nice as i felt that i had improved allot in my animation, the character lifting the ball was the earliest and the walks being the latest bit of animation i did. Even though this semester i haven't done a great deal of actual animation i really enjoyed animating these pieces and specifically the walk. I think it was because these animation were more focused on getting performance into the animation and bringing the characters to life more.
Wednesday, 15 May 2013
Walks with Performance
Here we were asked to animate 3 walks from a list of various walks. A walk is a very important thing when it comes to animation and is supposed to be one of the hardest things to get right. we had to animate these three walks but put performance in them and over exaggerate them slightly. The idea if this brief was to get us to study peoples walks. i found this really interesting and enjoyed the studying part allot more than the animation.
i chose to animate a macho male walk, a flirty female walk and a sad walk. when doing these animations i used Richard Williams animators survival kit book as guidance as it has a great section on the timing of walks.
Flirty Female Walk
I felt that this was maybe the most successful one because i felt it had more performance in and stronger key poses in.
Macho Male Walk
This walk didn't go as well, i don't know why it didn't look great. but i feel it was because the walk its self needed to be over exaggerated more to make it obvious what walk it is because me this looks more like a confident happy walk.
Sad Walk
Again i feel like this walk needs allot more work to it but all together i didn't mind doing this one and was relatively pleased with it and found it a simple walk to do as there are allot of very subtle movements.
Looking back on these walks i know that they all need working on and need more performance in them but all in all i enjoyed animating walks and feel like it is something i would do more of just for good practice.
Tuesday, 5 March 2013
Emotion Change
The brief for this animation was to have a character showing an emotion, something then happens and the emotion changes. I chose to do something simple and focus more on the face purely because i feel that i haven't done much facial animation and i really enjoy it.
Tuesday, 19 February 2013
Lifting weight
This task was all about adding performance into are animation. we simply had to animate a character lifting a weight. But to focus more on the anticipation and performance in the animation.
Again this was a test and is still a working progress, i was happy with it overall but feel like some of the movements need to be smoother, the timing could be adjusted slightly and more detail could be put into the hand and face movements.
Thursday, 24 January 2013
Lip sync
This animation was all about getting us to animate to a sound track and getting the actions right, but also to do the lip sync on the character.
I loved doing this animation to the sound track as i found it easier to get the movements right and overall with the lip sync, facial animation and audio it feel that the character has life to it.
Subscribe to:
Comments (Atom)